23 Ways to Tag and Segment Your Subscribers in AWeber

The days of one-size-fits-all email marketing are long gone. To get better results, you need to send targeted, personalized emails.
By delivering hyper-relevant content to those who are most interested in it, your subscribers will open, click, and purchase more.
In this post, you’ll learn how to use tags to create more targeted segments (or groups) of subscribers and increase your engagement.
What are tags and why should you use them?
Tags are simple words or short phrases you use to categorize and group your subscribers based on their interests, behaviors, or other shared attributes.
They allow you to segment your audience, send targeted one-time broadcast emails, and trigger targeted, automated campaigns. This leads to better subscriber engagement, improved chances of hitting the inbox instead of the spam folder, and higher conversions.
Start getting more personal with your subscribers and try these 23 easy ways to tag your subscribers in AWeber.
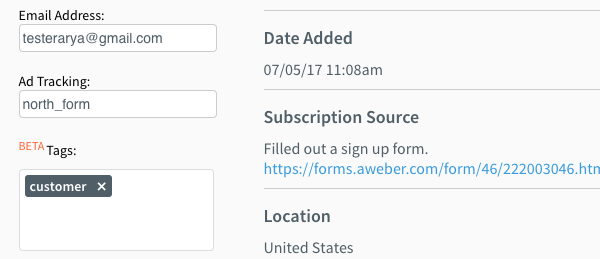
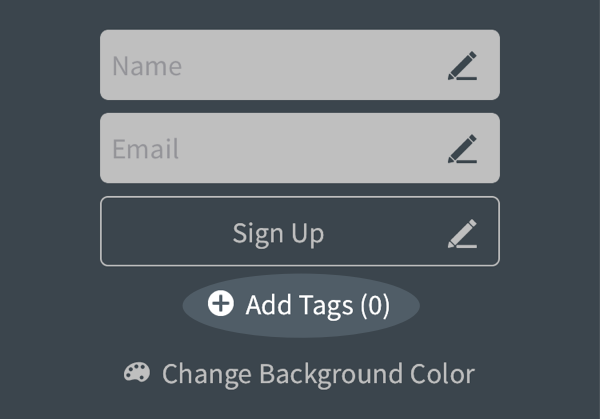
1. Tag someone who fills out your AWeber sign up form.
The easiest way to tag a subscriber is when they opt in to your email list using a sign up form.
With AWeber, you can create unlimited sign up forms, and you can apply different tags to subscribers when they fill out different forms. This way, you’ll know exactly which form a subscriber used to sign up.
For example, if you offer a 7-day email course, weekly newsletter, and downloadable checklist as lead magnets, you can have three separate sign up forms that apply unique tags to your subscribers. This lets you see quickly which lead magnets they signed up for. Iff they opt in to all of them, all three tags get applied!
Related: How to tag an AWeber sign up form
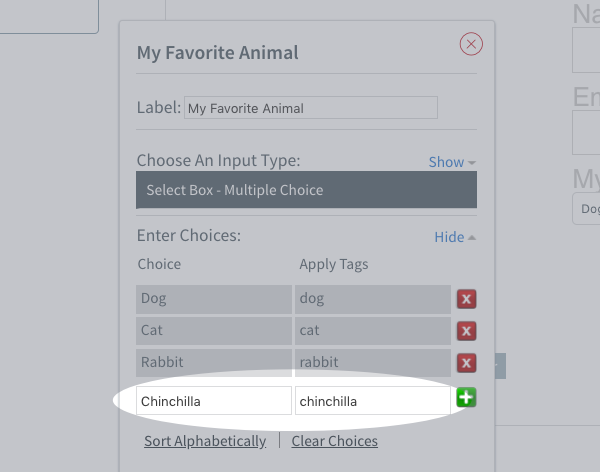
2. Tag someone who completes a custom field on your sign up form.
Let’s say you want to know a bit more about your subscribers at the time they sign up, such as what topics they’re interested in, or their experience level in a particular skill you teach.
You can collect this additional information, beyond just their name and email address, using custom fields on your AWeber sign up form, and you can associate a tag with each custom choice.
This allows you to segment your subscribers from the time they join your list, and create personalized experiences for each of them.
Related: How to tag a custom field in an AWeber sign up form
3. Tag someone who fills out a sign up form on the AWeber Atom App.
Do you attend in-person events? Using the AWeber Atom App, you can create a sign up form on your mobile device to collect subscribers’ information in person, and use tags to remind you which event you met them at.
And if you attend multiple events, you can change which tags your Atom App sign up form applies. That way, you know where you met each particular subscriber.
You can even set up an automated welcome Campaign ahead of time that would go out to each new subscriber you met at that event.
Related: How to tag someone with the AWeber Atom App
4. Tag subscribers when you import them into AWeber.
Perhaps you have a list of new subscribers you’re migrating to AWeber. (Side note: We offer free migration support. Contact our experts to learn more!) You can easily import your list along with any existing tags or apply new tags.
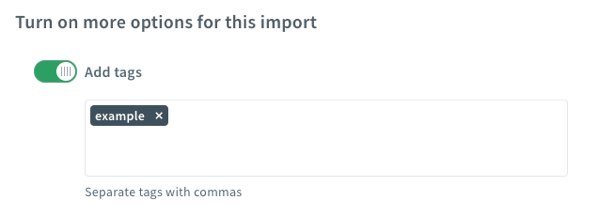
You can also update existing subscribers’ tags when importing a list into AWeber. This will add any new tags in your import file to your existing subscribers.

Related: How to tag subscribers when importing into AWeber
5. Tag someone who fills out a sign up form on a landing page that integrates with AWeber.
You can use a landing page provider like Unbouce or Growtheme to invite your audience to subscribe to your email list, and tag them so you can send them the perfect email campaign based on the page or form they completed.
6. Tag someone who fills out a sign up form that integrates with AWeber.
Although AWeber enables you to create sign up forms in your account, you can also integrate your AWeber account with other sign up form providers, such as OptinMonster, Hello Bar, MailMunch or ConvertFlow. These providers support AWeber tags, allowing you to tag your new subscribers in your AWeber account.
7. Tag someone who makes a purchase.
Have a digital or physical product? Providers like Shopify, WooCommerce, ThriveCart, 3dcart, and DirectPay allow you to easily add your customers into your AWeber account and tag them so you know who purchased from you.
AWeber’s Shopify integration even allows you to apply unique tags for each product your subscribers purchase.
Related: Watch this demo to learn more about AWeber’s Shopify integration
8. Tag someone who abandons their shopping cart.
With AWeber’s Shopify integration, you can tag a subscriber who left items in their cart and didn’t purchase them. You can send them an automated email to encourage them to finish their purchase.
You can apply a generic tag when someone abandons any purchase , or you can apply unique tags based on the product that someone abandons.
Related: How to set up cart abandonment with Shopify
9. Tag someone who completes a quiz.
Quizzes are a great way to provide a fun, interactive, and educational experience for your audience. Tools like Interact and Quiz Cat allow you to create engaging quizzes and tag your subscribers in AWeber who complete your quiz.
10. Tag someone who registers for your webinar.
Webinars are a great way to engage your audience directly and provide educational content to your subscribers. Tools like EasyWebinar allow you to add your webinar registrants directly to AWeber, and tag them based on the webinar they signed up for.
Then, you can automate reminder emails and follow up with your registrants after the webinar to share the recording and special offers.
11. Tag someone who subscribes from a text message.
Using a tool like Call Loop allows you to invite your audience to text a number to join your email list. Using the Call Loop integration with AWeber, you can add these individuals automatically to your email list, and tag them.
12. Tag someone who enters your contest.
Contests are a great way to engage your community and grow your email list. Using tools like Gleam or ViralSweep, you can automatically add contest participants to your AWeber email list, and tag them based on the contest they joined.
13. Tag someone who uses an online calculator or requests a custom quote.
Do you offer quotes, online calculators, polls or chatbots as part of your business? Tools like Outgrow allow you to add your interested prospects automatically to your AWeber account, and tag them accordingly, so you know exactly who they are and what they expressed interest in.
14. Tag new contacts from your CRM.
Do you use a CRM to manage client relationships? With tools like Agile CRM, you can automatically add your client and prospect contacts to your AWeber account, tag them with specific categories, and automate emails to keep your contacts engaged.
15. Tag someone who begins your automated campaign.
One way to tag subscribers is when they begin a campaign. This is helpful if you want to easily identify subscribers who are currently going through a Campaign so you don’t send them your regular broadcast emails as well.
Once they complete the Campaign, you can automatically remove that tag.

Related: How to use tags at the beginning of a Campaign
16. Tag someone who completes your automated campaign.
Another way to tag subscribers in a campaign is at the end of the series. This allows you to link campaigns together.
For example, you may have multiple welcome campaigns for different sign up forms, and you may want them all to flow into a general nurture campaign after each welcome campaign is complete. Simply apply the same tag at the end of each campaign, and then set the general nurture Campaign to start on that tag.
Related: How to use tags at the end of a Campaign
17. Tag someone at any point in your automated campaign.
Let’s say you have a welcome campaign where your first two emails welcome your new subscribers and introduce them to you and your business.
Then, for the rest of the campaign, you’re trying to sell them on your products or services. You can apply a tag before the sales emails begin so you know which subscribers are being actively sold to. With this data, you can assess the effectiveness of your offers and improve the sales copy.
Related: How to use tags in the middle of a Campaign
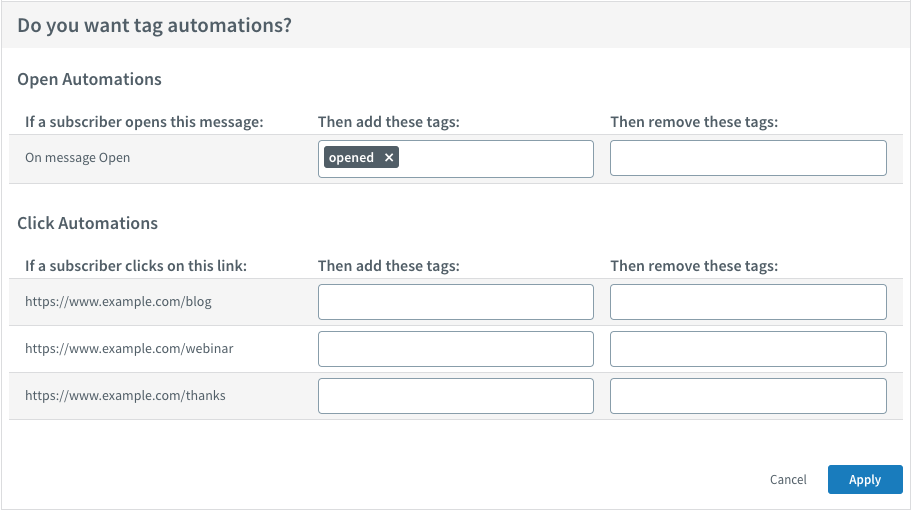
18. Tag someone who opens an email in your automated campaign.
Tags can also be used to record specific actions your subscribers take within your campaign. For example, you can tag subscribers when they open specific messages in your campaign.
This helps you identify subscribers who expressed an interest in the topic of the email by opening it.
Related: How to add a tag when someone opens a message in a Campaign
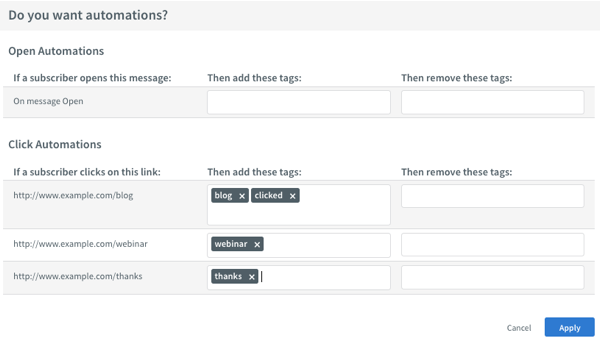
19. Tag someone who clicks a link in your automated campaign.
Similarly, you can tag subscribers when they click specific links within the messages of your campaigns. This is helpful when you’re trying to learn more about your subscriber’s preferences.
For example, in our blog welcome campaign, we ask what our subscribers are interested in learning, and we provide links within that email. Each link has a different tag, and it allows our subscribers to self-select their interests so we can better target them with relevant content.

Related: How to add a tag when someone clicks a link in a Campaign
20. Tag someone who opens a broadcast email.
You can also tag subscribers when they open one-time, broadcast emails. Similar to tagging subscribers who open your Campaign messages, this helps you identify who is interested in the topic of the email enough to want to open it.
Related: How to tag someone who opens a broadcast
21. Tag someone who clicks a link in your broadcast email.
If you’re promoting an upcoming webinar in a broadcast email, you can tag anyone who clicks the registration link and send them an automated email with the link to join the webinar. This improves the subscriber experience by eliminating the need to fill out another form to sign up for the webinar.
Related: How to tag someone who clicks a link in a broadcast
22. Manually tag an individual subscriber.
In addition to automatically tagging subscribers, there are times when you may want to manually apply tags to individual subscribers.
Let’s say you meet someone at an event and they agree to join your email list, but you don’t have a sign up form handy. You can add them to your list manually, and apply a tag that indicates where you met them. You can also apply another tag that adds them to an automated email campaign.
Related: How to manually tag an individual subscriber
23. Manually tag a large group of subscribers.
Let’s say you want to launch a new automated email campaign to subscribers who are already on your list. You can create the campaign and set it to launch for subscribers with a certain tag. Then, identify which subscribers you’d like to add to the campaign, and apply a tag to them all at once.
Or, let’s say you’re launching a new course and want to promote it to subscribers who have expressed interest in the course topic in the past. You can search for those subscribers and bulk apply a tag to them. henThen, create a segment of subscribers with this tag and send a one-time email to them that promotes your new course.
Related: How to manually tag a group of subscribers
Start using tags today.
Using tags to organize your subscribers enables you to provide a more personalized experience for your subscribers and increase your engagement.
Not an AWeber customer yet? Start your free 30-day trial today and try AWeber’s tags today.
The post 23 Ways to Tag and Segment Your Subscribers in AWeber appeared first on Email Marketing Tips.