The 7-Day Challenge to Jumpstart Your Email Marketing in 2020

Every year, 80% of new year’s resolutions fail by the time February rolls around. Launching your email marketing strategy shouldn’t be one of them.
That’s why we created a simple, 7-day challenge to help you dominate email marketing in 2020.
By the end of it, you’ll have launched the most important parts of a successful email marketing strategy. And the best part? You only need 30 minutes or less each day to complete this challenge.
(Don’t have an email marketing platform? You’ll need one. Set up a FREE email marketing account in AWeber.)
Day 1: Choose your email template and brand it. (30 minutes)
This step is often overlooked. Many people use different email templates every time they send an email. Or, they never fully customize a template to match their brand.
But branding an email template and using it consistently are important. Your brand sets you apart from your competitors. It allows you to be unique and develop a personality for your business. It builds credibility and trust between you and your subscribers. Your subscribers can see your content and immediately tie it back to you.
Step 1: Choose your email template. Find an email template that works with your brand and your message. A plain template is often better than one already filled with colors and background images, because it’s easier to make it your own. Then, add your logo to the top or bottom of the email. (Inside AWeber, there are 8 NEW email templates you can easily customize to fit your branding. Choose the template format you’d like. Then drag and drop to add your images and build the layout you want.)
Step 2: Add your brand colors to your template. Don’t overdo it! Too many colors can be distracting. Try adding your brand colors in just a few places, like your call-to-action buttons, header image, or headlines.
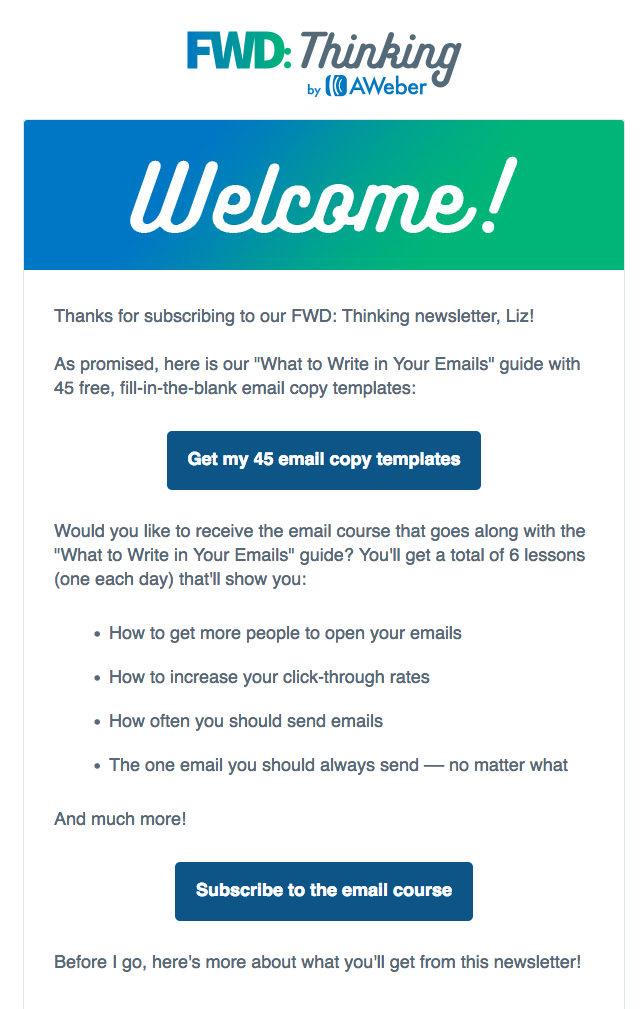
For example, in the welcome email of AWeber’s FWD: Thinking newsletter, we incorporate our brand colors by using a header image with AWeber’s green and blue gradient and a call-to-action button with our brand’s shade of blue.
Homework: Watch this video on How to Design an Awesome Welcome Email.
To do: Choose an email template and add your logo and brand colors to it.
Day 2: Customize your confirmation message. (15 minutes)
A confirmed opt-in message is an email you send people immediately after they fill out your sign up form. It asks them to verify they want to subscribe to your emails by clicking a link or button in the message.
Confirmation messages are optional but strongly recommended. They serve as proof that your subscribers definitely want to be on your list. So internet service providers (like Gmail and Yahoo!) may deliver more of your messages to the inbox when you use confirmation messages. Plus, it prevents subscribers from signing up using fake email addresses.
To make your subscribers more likely to confirm their subscription, you can follow these common best practices for confirmed opt-in emails:
- Keep your content short.
- Explain the value your subscribers will receive by subscribing to your list.
- Tell them what they need to do to confirm.
Homework: Read Writing Confirmation and Welcome Emails People Love.
To do: Set up and customize the subject line and content of your confirmed opt-in email. (If you’re an AWeber customer, you can follow these directions to complete this step.)
Day 3: Create a sign up form. (30 minutes)
Sign up forms allow your subscribers to easily join your email list. You can promote your form by adding it to your website and sharing a hosted sign up form with your audience. Hosted sign up forms allow you to share your form anywhere, even if you don’t have a website.
Homework: Read 9 Inspiring Sign Up Form Ideas to Grow Your Email List.
To do: Write your sign up form copy and build your form using ideas from the homework post you just read.
Day 4: Write your welcome email (30 minutes)
A welcome email is the first message subscribers receive after joining your list and confirming their subscription. And it gets a lot of attention — on average, open rates are 4 times higher and click-through rates are 5 times higher than other emails, according to marketing research company Experian. You can take advantage of this above average engagement by crafting an excellent welcome email.
Your welcome email should:
- Welcome subscribers to your email list.
- Deliver the lead magnet you promised on your sign up form.
- Explain what kind of content you’ll send subscribers, how often you’ll send it, and what they’ll learn.
- Introduce yourself or your business.
- Ask subscribers to add you to their address book. (This is called whitelisting and it can help more of your emails bypass the spam folder.)
Once you draft your welcome email, take some time to personalize it! Personalization makes your subscribers feel you’re writing a message specifically to them. Something as simple as including your subscriber’s first name in the subject line or body of your welcome email can boost opens and clicks.
Homework: Read The One Email You Should Always Send and How Personalization Can Help You Connect with Subscribers.
To do: Write and build a welcome message for your subscribers using AWeber’s Drag and Drop Email Builder.
Day 5: Automate your welcome email. (10 minutes)
You wrote your welcome email. Your next step? Automate it. That way, your subscribers will receive it immediately after they sign up for your list.
Simply create an automated series for new subscribers in your email marketing platform. Here’s how:
- Build a new automation series in your email marketing platform. Make sure it’s set up to send to every new subscriber.
- Paste your welcome email content into the template you chose on day 1.
- Add your welcome email to the series.
- Activate your series.
Your email marketing system does the rest!
Homework: Read Email Automation 101: How to Use Automation.
To do: Create a welcome series using AWeber’s automation platform Campaigns and add in your welcome email. (Here are step-by-step instructions for setting up your own welcome series in AWeber.)
Day 6: Publish your form on your social media channels. (20 minutes)
Your list is set up and your confirmation and welcome messages are ready to go. Now it’s time to put your hard work to the test and start to grow your list!
An easy first step is turning you social media followers into email subscribers. People who follow your brand on social media have already shown they want to hear from you. And there’s no better way for them to stay up to date on your latest content and sales than joining your email list.
Post a link to your hosted sign up form on Facebook, Twitter, and LinkedIn and ask your social followers to subscribe for exclusive updates.
Homework: Read 7 Expert Tricks to Grow Your Email List with Social Media.
To do: Add your sign up form to your Facebook profile and tweet out the hosted URL to your form.
Day 7: Share your sign up form with your connections. (20 minutes)
Reach out to the people you already know, like colleagues, friends, or family members. Ask them if they want to sign up for your email list.
Let them know what content you are offering and explain the benefits they would receive if they sign up.
If they say no, maybe the content you’re offering just isn’t for them. But maybe they know someone it would be perfect for. You never know until you ask!
Homework: Read How To Get Your First 50 Email Subscribers in Less Than 30 Days. Use the fill-in-the-blank copy template in this post to easily reach out to people.
To do: Contact 5 people you know. Send them the hosted URL to your sign up form and ask if they’d like to join your email list or share it with someone they know.
Ready, set, go!
Congrats! If you completed this 7-day challenge, you’re well on your way to launching a successful email marketing strategy.
Want more content like this? Subscribe to our FREE weekly email newsletter FWD: Thinking for email marketing tips from the pros.
Bonus challenge
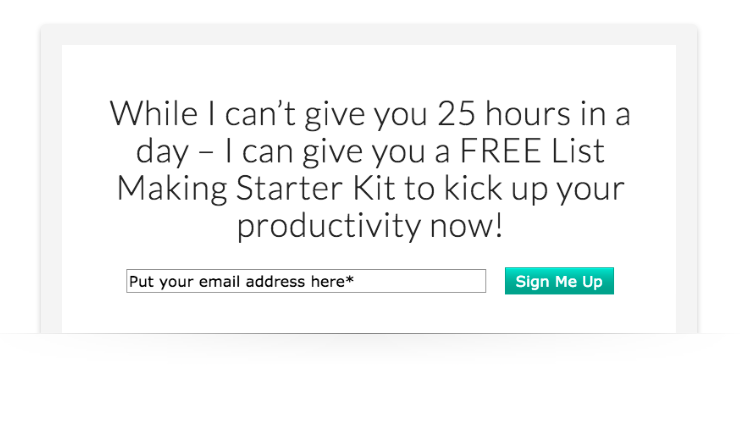
Ready for your next challenge? Then try this: Create a lead magnet — a freebie you give subscribers when they sign up for your list. Lead magnets can increase the conversion rate of your sign up form.
For example, author and productivity expert Paula Rizzo offers a free List Making Starter Kit in return for signing up for her email newsletter, which she sends via AWeber.
Homework: Read How to Create a Lead Magnet in Less Than a Day.
To do: Build a lead magnet, add a link to it in your welcome email, and mention it on your sign up form.
The post The 7-Day Challenge to Jumpstart Your Email Marketing in 2020 appeared first on Email Marketing Tips.